PROGRAMMING NOTE: My post on running diambra reinforcement learning training from Colab is still coming, but might be posted elsewhere.
UPDATE: This post discusses running the storage (postgres and minio) in docker containers and the mlflow UI from the command line. The post references a github repo at this commit. I’ve since edited the associated github repo to run the mlflow UI in a docker container as well from docker-compose, inspired by this tds post. The below should still work, but take a look at that post and the repo for the full docker setup.
Table of Contents
Introduction
Are you ready to learn about a bunch of random stuff I’ve been playing around with? “God, I hope he decided to try to get mlflow working with minio and postgresql and then use hydra to manage the configuration of the mlflow runs” you’re thinking. Being plugged-in to the mind of the modern data scientist who is reading random blogs, I have delivered on your wishes.
I’ve used mlflow several times at work, mostly as an organization tool, and a couple times with the experiments feature on Databricks. Run a bunch of stuff, collect metrics, outputs, etc, and have a UI/API that I can use to retrieve things. However, I’ve never actually used it with a proper storage backend that I set up myself. There is always just that ugly mlruns/0 folder in my project directory or elsewhere with a bunch of nonsense folders under it.
Okay, so I figured I’d try out using mlflow + minio to store arifacts and a postgresql database to store metadata/metrics. I also wanted to use hydra to manage the configuration of mlruns just as an exercise. I’ve used hydra a couple times before and can never decide if the juice is worth the squeeze in terms of how much it actually improved over argparse + some manual munging of arguments. Regardless, it is neat and I wanted to use it again.
You can find resources to follow along with this post in my little github repo that I’ll hopefully expand on with more experiments in the future (…The year is 2040, the repo has not been updated since 2024, mutant dogs roam the streets, Daniel Claborne’s readers have long abandoned him after losing hope they would see more toy examples of using mlflow…).
Requirements
- Create the conda environment or otherwise install the dependencies in environment.yml. There’s a bit of fluff in there from cookiecutter datascience, the main dependencies are mlflow, hydra, sklearn, boto3, psycopg2.
conda env create -f environment.yml- Install docker and docker compose: https://docs.docker.com/compose/install/
Run minio and postgres
This basically follows the instructions in this mlflow tutorial. Put the following in a file called docker-compose.yml or download the file I have in the repo.
services:
  postgres:
    profiles:
      - ''
      - 'mlflow'
    image: postgres:latest
    environment:
      POSTGRES_USER: ${POSTGRES_USER}
      POSTGRES_PASSWORD: ${POSTGRES_PASSWORD}
      POSTGRES_DB: ${POSTGRES_DB}
    ports:
      - 5432:5432
    volumes:
      - ./postgres-data:/var/lib/postgresql/data
  minio:
    profiles:
      - ''
      - 'mlflow'
    image: minio/minio
    expose:
      - "9000"
    ports:
      - "9000:9000"
      - "9001:9001"
    environment:
      MINIO_ROOT_USER: ${AWS_ACCESS_KEY_ID}
      MINIO_ROOT_PASSWORD: ${AWS_SECRET_ACCESS_KEY}
    healthcheck:
      test: timeout 5s bash -c ':> /dev/tcp/127.0.0.1/9000' || exit 1
      interval: 1s
      timeout: 10s
      retries: 5
    command: server /data --console-address ":9001"
    volumes:
      - ./minio-data:/data
You’ll notice I have a bunch of environment variables used to set password. For example purposes, you can change these to whatever you want (user:user, password:password, db:mlflow, etc).
Lets start these containers with docker compose:
docker compose up -dYou should be able to navigate to http://localhost:9000 and see the minio UI. You can log in with the credentials you set in the docker-compose file. The docker compose file will create a bucket called mlruns for you by default.
Run the mlflow tracking server
Finally, we run the mlflow tracking server, which basically acts as an intermediary between the mlflow client and the storage backend. We need to set some environment variables again (UHG):
export MLFLOW_S3_ENDPOINT_URL=http://localhost:9000 # where the minio service is running
export AWS_ACCESS_KEY_ID=minioadmin # minio username
export AWS_SECRET_ACCESS_KEY=minioadmin # minio password
These essentially tell the mlflow tracking server where to find s3-like storage. Finally, we can start the tracking server with the following command:
mlflow server \
    --backend-store-uri postgresql://user:password@localhost:5432/mlflow \
    --artifacts-destination s3://mlruns \
    --host 0.0.0.0 \
    --port 5000

# OR using make
make mlflow-server
Where you can replace user, password, and mlflow db with whatever you set in the docker-compose file, e.g. POSTGRES_USER -> user, POSTGRES_PASSWORD -> password, POSTGRES_DB -> mlflow.
The s3://mlruns thing is a bit confusing….basically mlflow has stored the specifics of where ‘s3’ is, namely using the MLFLOW_S3_ENDPOINT_URL environment variable. So, when you set --artifacts-destination s3://mlruns, it is actually going to use the minio service we set up earlier, and store the artifacts in the mlruns bucket.
Navigate to http://localhost:5000 to see the mlflow tracking server UI, which should be blank at this point. Lets add some experiments/runs to it!
NOTE: The Makefile also has a convenience target to start the mlflow server and the docker-compose services at the same time:
make mlflow-plus-storageRun the example
In src/basic-example.py I use mlflow to very simply log the input parameters, train an sklearn model on practice data, log the trained model as an artifact, and log performance on the test set.
We need to tell the script where to find the mlflow tracking server, which we can do with the following (wait for it) environment variable:
export MLFLOW_TRACKING_URI=http://localhost:5000Which should match whatever host/port you set when starting the mlflow tracking server.
Lets just try running this training script vanilla:
python src/basic-example.pyThe run should complete fairly quickly and now display in the mlflow UI:

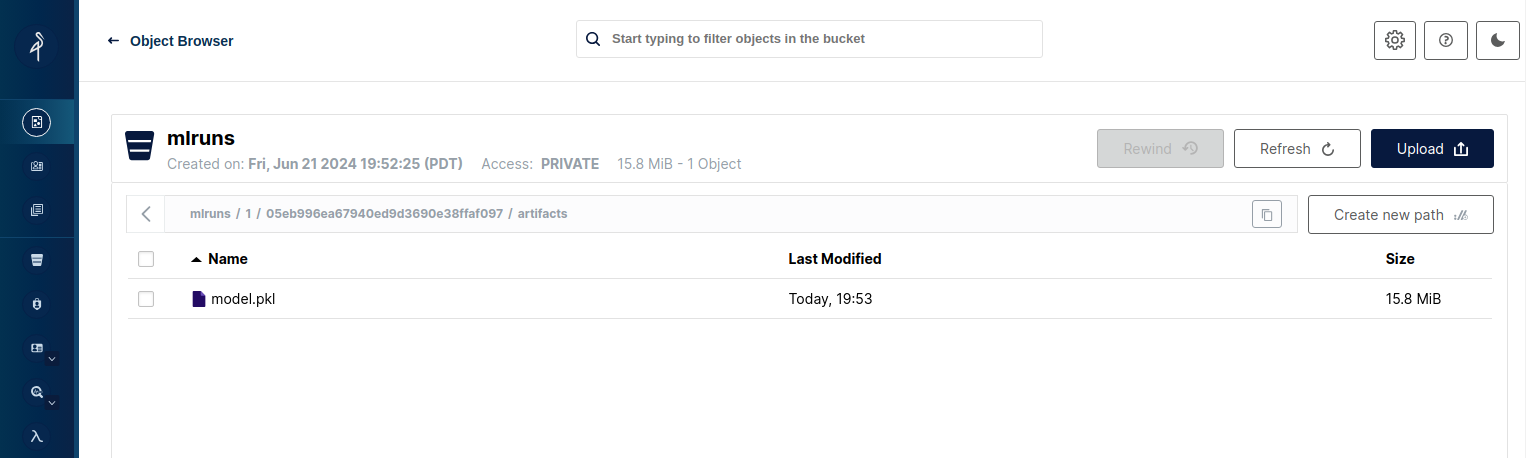
Additionally, artifacts are stored in the mlruns bucket in the minio service under <experiment-id>/<run-id>
Extra options with hydra
Hydra allows us to manage configuration options in a more organized way. In this simple example, I have under cfg a config.yaml file that specifies the parameters for the training script. One is the experiment name to be displayed under the mlflow UI, and the other is the config group ‘model’, which allows me to specify what kind of model I want to train. The parameters of these models are stored in further yaml files under cfg/model. They contain the actual sklearn class or ‘target’ that I want to use to construct the model object as well as the parameters to pass to the constructor. For example, cfg/model/randomforest.yaml looks like this:
_target_: sklearn.ensemble.RandomForestClassifier
n_estimators: 100
max_depth: 10
random_state: 42
Under the ‘top level’ config.yaml file, this is the default:
defaults:
  - model: randomforest

experiment_name: mlflow-practice
Note that I do not include the file type in the model parameter. See the hydra docs for more about the defaults list.
Suppose I wanted to train an SVM instead of a random forest, I have another config for SVM in cfg/model/svm.yaml:
_target_: sklearn.svm.SVC
C: 1.0
gamma: scale
kernel: rbf
I can specify the model to use with the model parameter in the command line:
python src/basic-example.py model=svmOr change the value of one of the model parameters:
python src/basic-example.py model=svm model.C=0.1

# random forest

python src/basic-example.py model=randomforest model.n_estimators=50
Or even add a parameter that is not in the default config:
# add the degree parameter to the svm model
python src/basic-example.py model=svm model.C=0.1 model.kernel=poly +model.degree=4
Hyperparameter sweeps
Yes yes, this is an sklearn example and you should just be using GridSearchCV or RandomizedSearchCV (in fact, with mlflow.autolog() mlflow will automatically log child runs of the main run) but I wanted to show how you can use hydra to perform multiple runs.
First the easy way with the -m flag. Here we sweep over 3 values of the C parameter for the SVM model:
python src/basic-example.py -m model=svm model.C=0.1,1,10 model.kernel=rbfYou can also specify a sweep config under the main config.yaml file. For example, I can specify a sweep over the C parameter for the SVM model like this in the top level config:
defaults:
  - model: randomforest

experiment_name: mlflow-practice

hydra:
  sweeper:
    params:
      model.C: 0.1,1,10
And then run the script without the -m flag:
python src/basic-example.py -m model=svmThis of course hard-cores the sweep configuration, we might like to have modular sweep configs. We can put further yaml files under cfg/sweep that specify the parameters to sweep over. For example, cfg/sweep/svm.yaml:
# @package _global_
hydra:
  sweeper:
    params:
      model: svm
      model.C: 0.1,1,11
The hydra/sweeper/params group is a special hydra group for performing sweeps. Here we specify the @package directive to notify hydra that we’re editing the config at the top level. We can then run the script with the sweep config like this:
python src/basic-example.py -m +sweep=svmIf you go to the mlflow or minio UI after all this you should see all these runs populated, and sortable by parameters and performance metrics:

Running on AWS ec2
If you want somewhere to host the data, you can easily spin up an ec2 instance and run the docker-compose file there.
Step 1: Set up and ssh into an ec2 instance. The AWS docs are pretty good on this, this tutorial should get you logged into an instance.
Step 2: Install docker and docker-compose on the ec2 instance. See this AWS documentation. In my testing, I used Amazon linux, where the commands to install are:
# install docker
sudo yum update -y
sudo yum install -y docker

# start the docker daemon
sudo service docker start

# add the ec2-user to the docker group so you dont have to do sudo docker commands
sudo usermod -a -G docker ec2-user
Check that docker works with docker run hello-world or docker ps.
Now you can either clone my repo from the instance or scp up the docker-compose file and run it on the ec2 instance. Once you have the two containers running, you need to edit your ec2 security settings to allow traffic on port 5432 (postgres) and 9000 (minio). You can do this in the AWS console under the security group settings for your instance.
Now run the mlflow tracking server as above, but replace localhost with the Public IPv4 DNS of your ec2 instance if you are running it from your desktop. You’ll need to specify this both for the --backend-store-uri flag and MLFLOW_S3_ENDPOINT_URL environment variable. You can find this in the AWS console under the main page for your ec2 instance.
export MLFLOW_S3_ENDPOINT_URL=http://<Public IPv4 DNS>:9000 # where the minio service is running
export AWS_ACCESS_KEY_ID=minioadmin # minio username
export AWS_SECRET_ACCESS_KEY=minioadmin # minio password

mlflow server \
    --backend-store-uri postgresql://user:password@<Public IPv4 DNS>:5432/mlflow \
    --artifacts-destination s3://mlruns \
    --host 0.0.0.0 \
    --port 5000
Then set MLFLOW_TRACKING_URI to http://localhost:5000 and run the training script as above. Of course if you run the mlflow server on the ec2 instance, you can set the MLFLOW_TRACKING_URI to the http://<Public IPv4 DNS>:5000 and add a new inbound rule to the security group to allow traffic on port 5000.
Well, I hope that was useful, but remember this was all for me not you. Not really sure what I learned here….but at least now I have some impetus to try out some other ML experiments since I have my own mlflow storage backend set up. Or I could just continue using wandb…..meh, whatever. Thanks for reading!